Sofia
- Introduction
- Philosophia Sofia
- Chapter 0
- Eclipse Install with ADT
- Chapter 1
- Getting Started with Android
- Chapter 2
- Structure of an Android Application
- Chapter 3
- Basic GUI-Driven Apps
- Chapter 4
- Testing GUI Apps
- Chapter 5
- Advanced Graphics
- Gallery
- Student Work Gallery
- Appendix A
- Sofia API
- Appendix B
- Demos and Downloads
Jump to...
Chapter 0
Eclipse Install with ADT
In this class you will be using the Eclipse development environment to write your Java and Android applications. Although the Google official Android IDE is Android Studio we will use Eclipse to take advantage of the integrated Web-CAT testing support and configured assignments. After following the instructions below to install Eclipse you will be instructed how to download and install the integrated the Android Development Tools (libraries, a device emulator, and other tools).
Downloading/Installing Eclipse
-
To use Eclipse you must have an installed version of the Java Runtime Environment (JRE). The latest version is available from java.com/en/download/manual.jsp. If after downloading Eclipse if it does not execute you will need to download and install the JRE, (or follow the instructions in step 2 to download and install the JDK which contains the JRE).
-
Since Eclipse includes its own Java compiler, it is not strictly necessary to have a version of the Java Development Kit (JDK) installed on your computer. You may wish to install the JDK anyway. The latest version is available from: www.oracle.com/technetwork/java/javase/downloads/ If you install the JDK, it is recommended that you locate it in a root-level directory; C:\jdk1.7.0_71. It is recommended that you use the x64 bit version if you have a 64 bit OS.
-
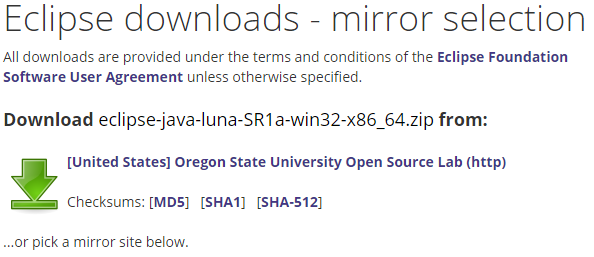
Web surf to www.eclipse.org and click on Download Eclipse:

-
Select the Eclipse IDE for Java development:

-
Download the distribution:
-
After the download has completed, decompress the Eclipse distribution folder into a folder. If you have previously installed another version, say Eclipse for C/C++, it is recommended that you place this version in a different directory tree, e.g., F:\eclipse. Note: the contents of the zip archive are already packed in a directory named eclipse, so simply specify that the extraction should be to F:\. Avoid spaces in the path to Eclipse. You may wish to put a shortcut on your desktop or launch menu; find eclipse.exe in the root directory of the installation and create a shortcut to it.
-
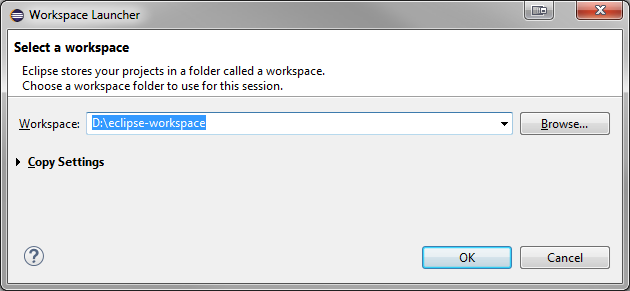
Start Eclipse.

The first time you start Eclipse, you'll be asked to specify a location for the Eclipse Workspace; this is where Eclipse will, by default, keep your programming projects: This can be any folder you wish.
-
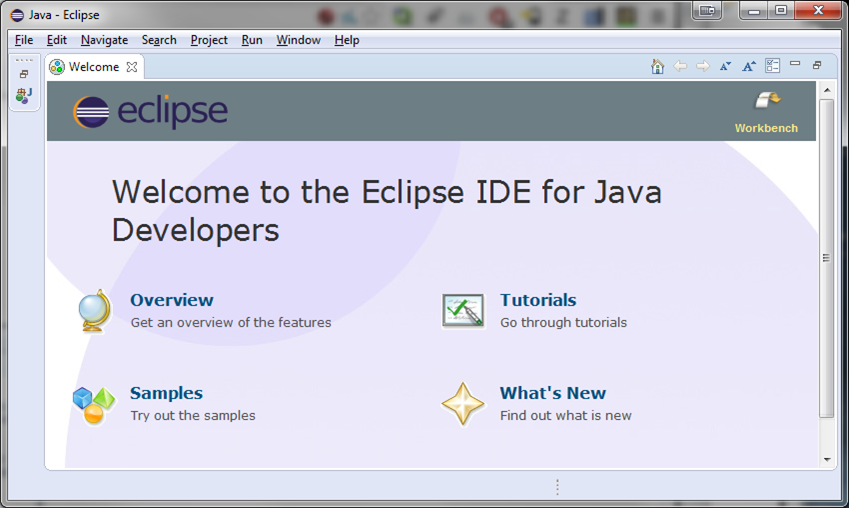
The initial Eclipse startup screen looks like:
-
Feel free to explore the options and then proceed to the Workbench.
-
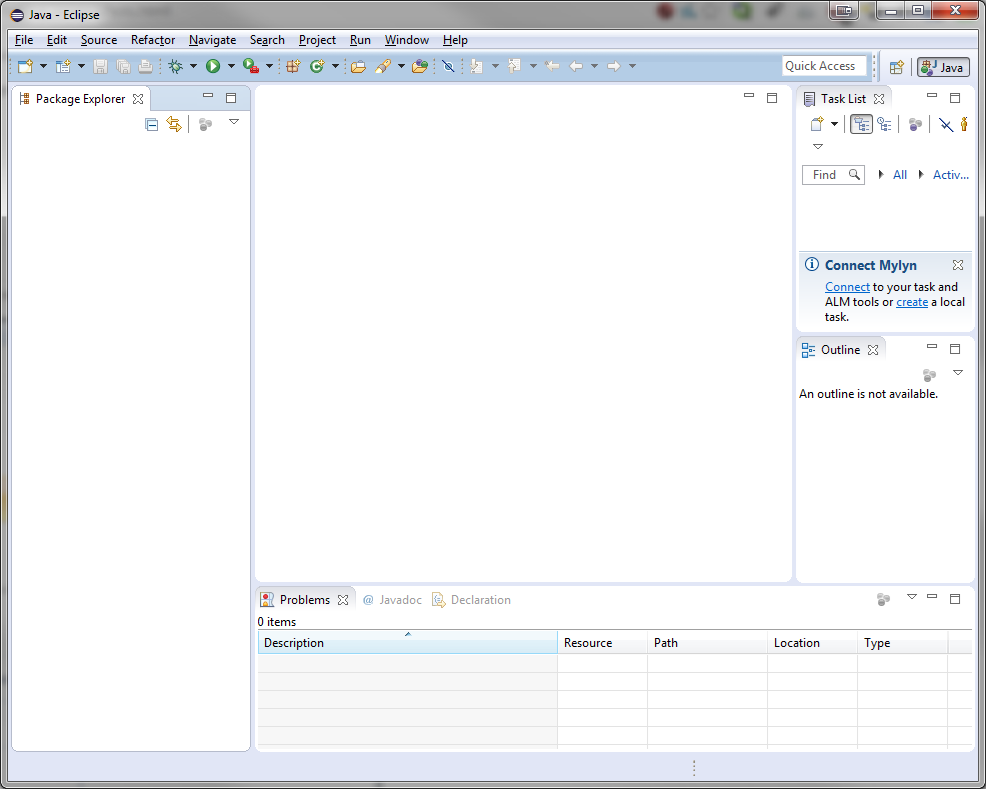
The initial Eclipse workbench:
-
Eventually you may want to use most of this, but you should consider cleaning it up to start.
-
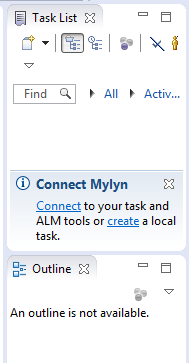
It is suggested you minimize the Task List and Outline Views on the right side of the Eclipse workbench:
Android Developer Tools (ADT)
The ADT Eclipse plugin is an integrated suite of tools supporting Android app development. The steps below will help you download and install it properly.
Download the ADT
-
Start Eclipse, then select Help > Install New Software.
-
Click Add, in the top-right corner.
-
In the Add Repository dialog that appears, enter "ADT Plugin" for the Name and the following URL for the Location: https://dl-ssl.google.com/android/eclipse/
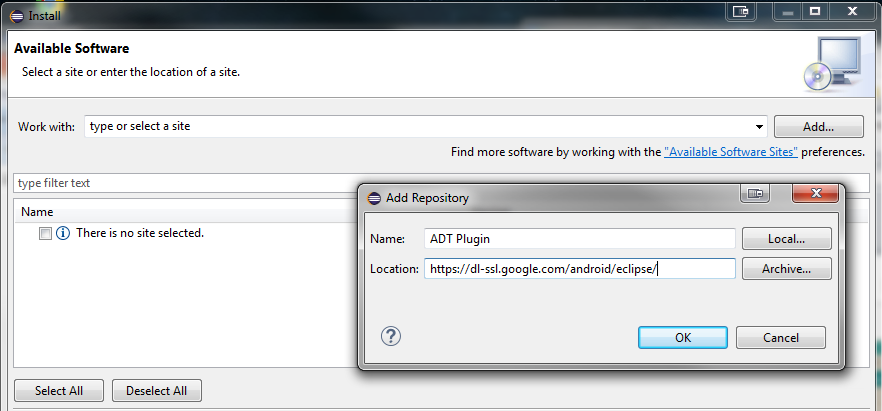
Note: The Android Developer Tools update site requires a secure connection. Make sure the update site URL you enter starts with HTTPS. -
Click OK.
-
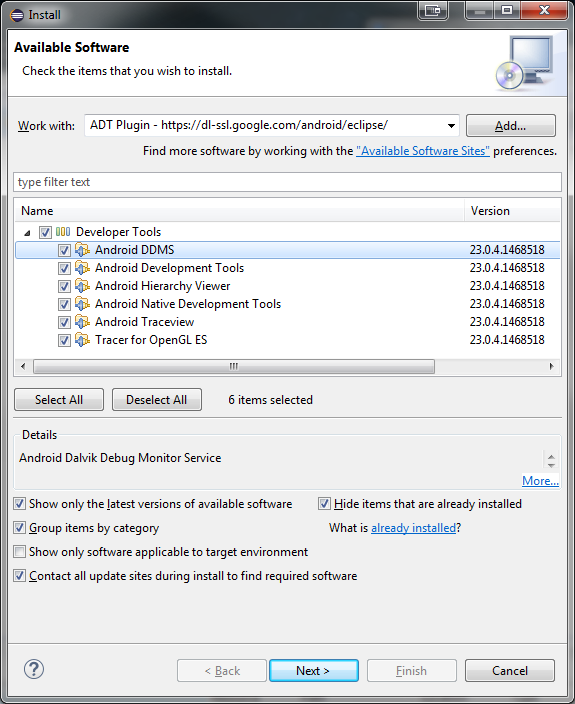
In the Available Software dialog, select the checkbox next to Developer Tools and click Next.
-
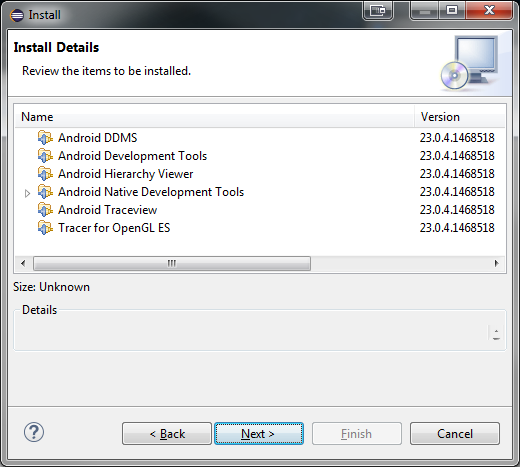
In the next window, you'll see a list of the tools to be downloaded. Click Next.
-
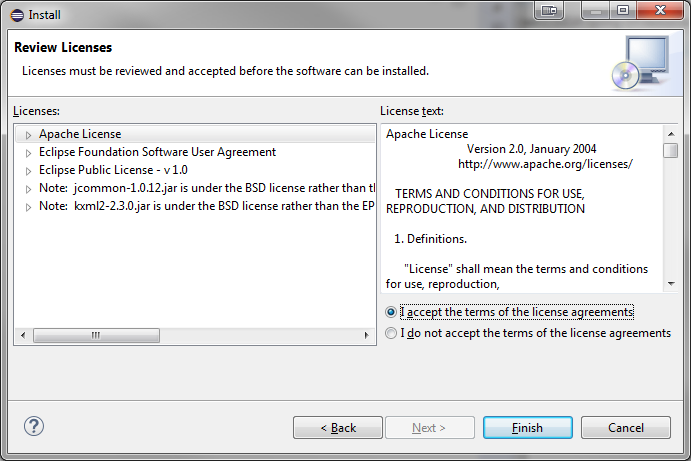
Read and accept the license agreements, then click Finish.
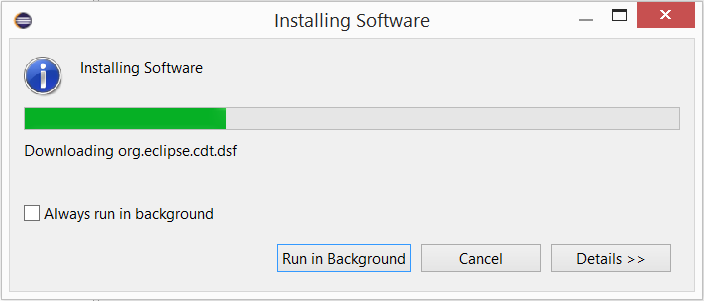
Wait for the download/install to complete.
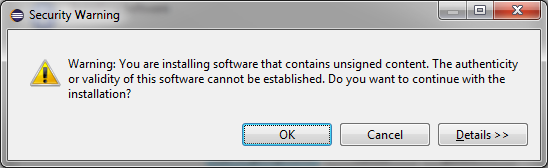
If you get a security warning saying that the authenticity or validity of the software can't be established, click OK.
-
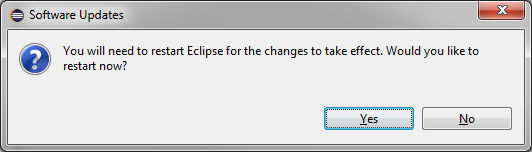
When the installation completes, restart Eclipse.
-
Once Eclipse restarts, you may need to specify the location of your Android SDK directory.
-
If a "Welcome to Android Development" window that appears, select Use existing SDKs.
-
Configuring the ADT
After installing the ADT you will need to download the Android API code libraries to build your apps.
-
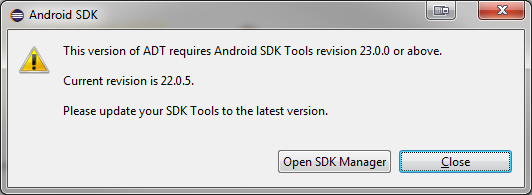
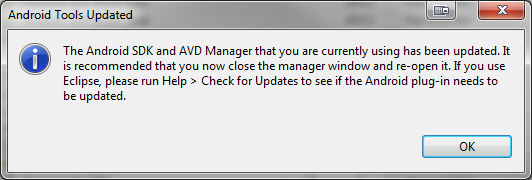
After restarting Eclipse you will receive an SDK update message:
-
Open the SDK manager, (from within Eclipse: Window/Android SDK manager). After the SDK manager loads you will be presented with a packages listing.
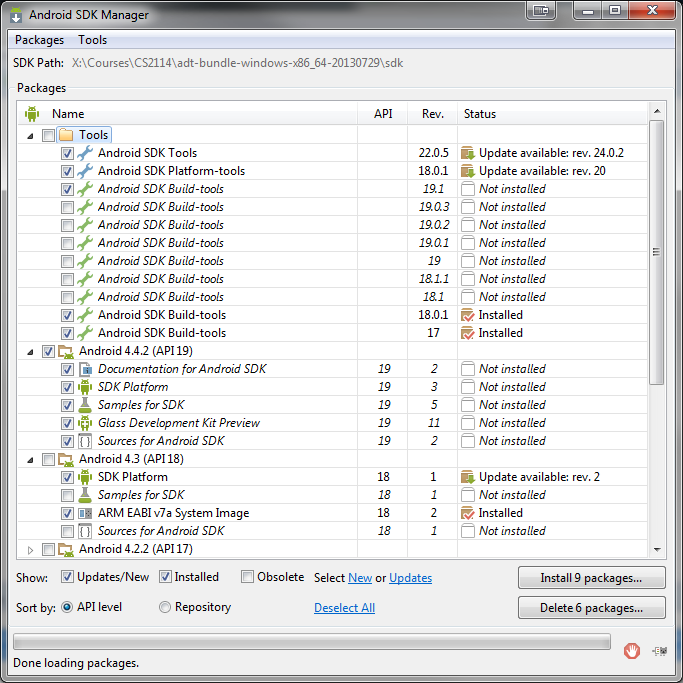
The image above shows the recommended tools and APIs to download, (except for the Glass Development Kit Preview which was accidentally selected). If you discover later you need other APIs the process to download them is the same. You do NOT need Android 5.0 API for this course unless you plan on using an Android device running 5.0 for testing your apps. -
After clicking the"Install <x> packages..." you will receive a confirmation window.
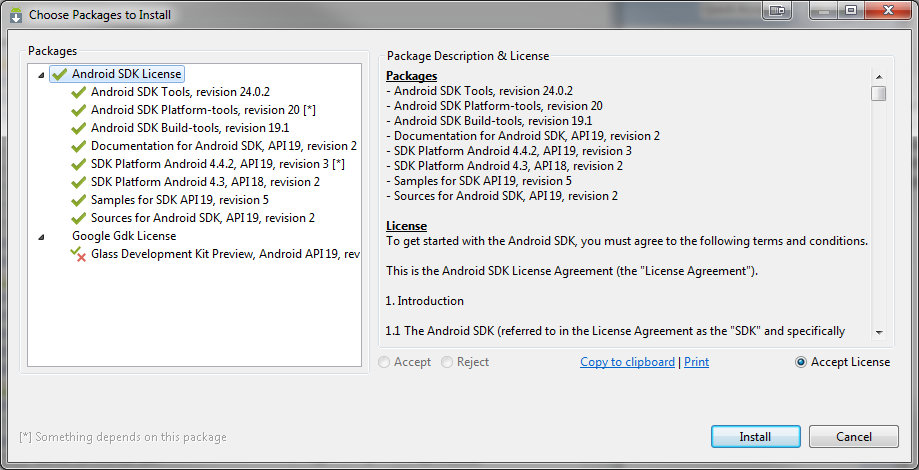
Click the "Install" button and wait for the packages to download.
-
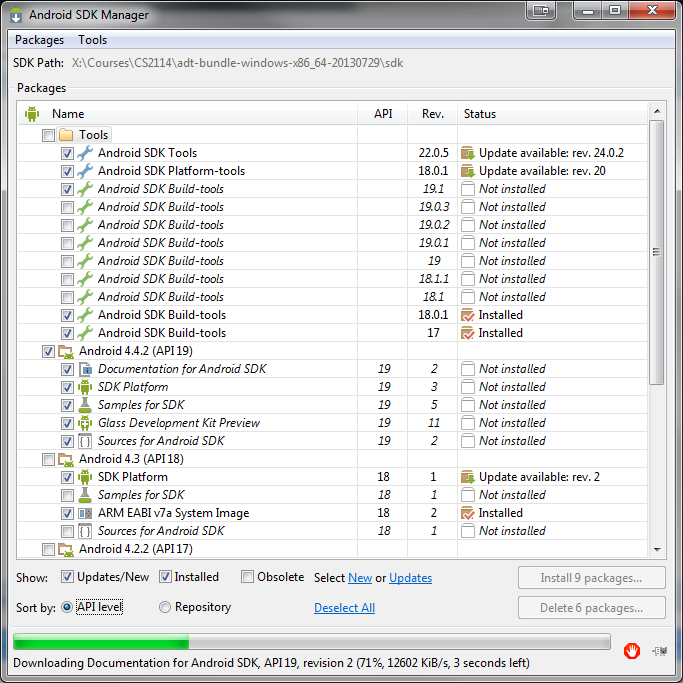
After the package download completes, you will be prompted to close the SDK Manager and re-open to check for further updates.
If you do so, (it should be unnecessary), be aware that it may indicate that you need other packages. Thiose package will most likely be for the Android technologies, (Google glass, Wearables, etc.), that we are not using. -
At the end of the SDK download/install you will be prompted to exit Eclipse and restart.

If no problems occurs the Eclipse will restart with no console messages.
A full listing of the current platform versions and the matching API level can be found here:
Android API Levels. -
If you do NOT encounter any install problems proceed through chapter one to configure Eclipse for the course.
Troubleshooting
-
No problems with the above install directions under Windows 7.
Minor issues occured under Windows 8.1. -
The following error dialog was encountered when downloading the ADT.
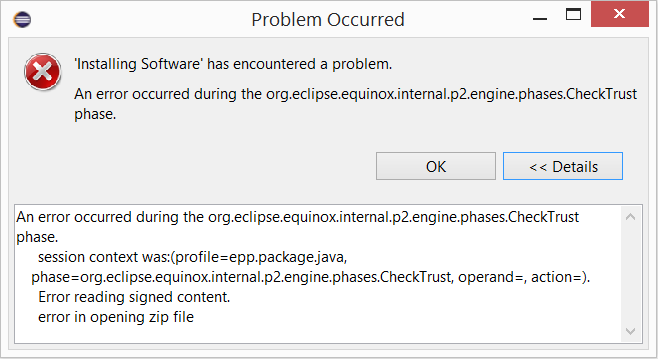
A quick google found hints for the solution at stackoverflow.com. Three solutions for this problem was found.-
Download only the Android Development Tools initially. After it is downloaded, download the other components: DDMS, Hierarchy Viewer, Native Development Tools, Traceview, OpenGL.
-
Download the components one at a time: DDMS, Development Tools, Hierarchy Viewer, Native Development Tools, Traceview, OpenGL.
-
In the Eclipse root install directory, delete the artifacts.xml file, restart Eclipse and proceed.
-
-
Solution a. was used and allowed the download to proceed. Unfortunately that resulted in a new problem.
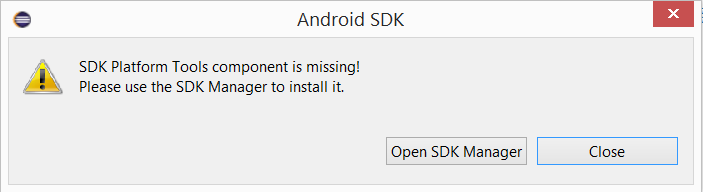
-
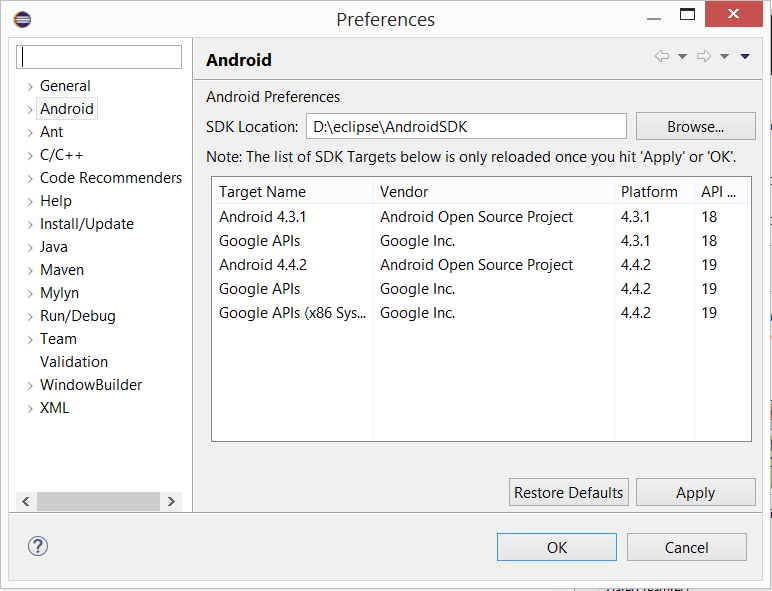
Opening the SDK Manager and browsing to find the SDK Location indicated that no SDK directory had been created by the ADT download. Any attempt to start the SDK Manager from within Eclipse, (Window/Android SDK Manager) to download the APIs resulted in Eclipse opening the Preferences to select the SDK directory. This catch 22 loop was solved by using Windows Explorer to open the Eclipse root install directory and manually creating an AndroidSDK directory and then within it creating a tools subdirectory. Selecting the tools subdirectory from within the Eclipse Preferences/Adroid as the SDK Location allowed the SDK Manager to be used to dowload the APIs.
-
The ADT Installing the Eclipse Plugin web page at developer.android.com contains a troubleshooting section near the end.
-
If you encounter problems not discussed here use google to try and find a fix, (the help at stackoverflow.com is quite good). You can also post an explanation of your problem on the course forums.